Start with SHiNeMaS
User Reference Guide
Biological entities
Species management
To manage species in SHiNeMaS go to the menu Admin data > Biological Entities > Species. This screen displays all the existing species in the database.
To create a new species click on ‘Add species’. The form must be filled with a name (‘species’ field) as well as the Latin name and a description (optional) for this species. Click on ‘Save button to validate its creation.
To edit a species, from the all species screen, click on its name. All information of a species can be edited with the form. Click on the ‘Save’ button to validate the modification.
To delete a species, click on the ‘Delete’ button at the down left corner and then confirm deletion in the next screen.
Germplasm type management
To manage germplasm type in SHiNeMaS go to the menu Admin data > Biological Entities > Germplasm type. This screen displays all the existing germplasm type in the database.
To create a new germplasm type click on ‘Add germplasm_type’. The form must be filled with a name for this type as well as a description for this germplasm type. Click on ‘Save button to validate its creation.
To edit a germplasm type, from the all germplasm type screen, click on its name. All information of a germplasm type can be edited with the form. Click on the ‘Save’ button to validate the modification.
To delete a germplasm type, click on the ‘Delete’ button at the down left corner and then confirm deletion in the next screen.
Germplasm management
To manage germplasm in SHiNeMaS go to the menu Admin data > Biological Entities > Germplasm. This screen displays all the existing germplasm in the database.
To create a new germplasm click on ‘Add germplasm’. The form must be filled with a name for this germplasm. It’s also possible to fill a germplasm type, a species (recommended) as well as the person who create this germplasm. Click on ‘Save button to validate its creation. It’s also possible to load a file describing Germplasm objects with the admin interface.
To edit a germplasm, from the all germplasm screen, click on its name. All information of a germplasm can be edited with the form except its name as it would impact all seeds lot names. Click on the ‘Save’ button to validate the modification.
To delete a germplasm, click on the ‘Delete’ button at the down left corner and then confirm deletion in the next screen.
Seeds lot management
To manage seeds lot go to the menu Admin data > Biological Entities > Seed lot.
From this menu you can Update/Delete a seed lot. To edit a seeds lot, from the all seeds lot screen, click on its name. Only few information can be edited with this form. The name, the germplasm, creation date can’t be edited as it would have an impact on all the descendants of this seed lot. Generation information can be edited but information of the descendants and ascendants is not yet recalculated. It’s up to the user to be careful with this information. Click on the ‘Save’ button to validate the modification. To delete a seeds lot, click on the ‘Delete’ button at the down left corner and then confirm deletion in the next screen.
It is not possible to create new seeds lot with admin web interfaces. New seeds lot are created through network events. You can also create new seed lot massively using the Prepare & upload files > Upload files > SeedLot file option. Use the link download template file and fill it with the requested columns (germplasm name, species name, location short name, creation year and initial quantity). Once your file is ready you can submitted it in the form. Note that your submission is audited.
A single seed lot can also be created with Admin data > Biological Entities > Seed lot > New creation form, fill it with requested information and submit.
Seeds lot storage
Once you have created some storage devices. You can assign a storage device to your seeds lot. To store seed lot go to Prepare & upload files > Upload files > Store seed lots.
The file to submit to store seed lots is a separated format (comma, semi-comma, tab etc.) text file. The headers are the following :
seedlot, level1, level2, level3, level4
Only seedlot and level1 are mandatory fields.
Note that :
A seed lot can’t be stored in a device that is not on in the same location. When the file is submitted, SHiNeMaS uses the location of the seed lot to find the corresponding device.
You can’t have a blank between two levels of devices. For instance, you can’t have level1=Device1, level2=’’ and level3=Device2.
This information will be displayed in the seed lot card.
Image management
To upload images go in the menu Prepare & upload files > Upload files > Image files.
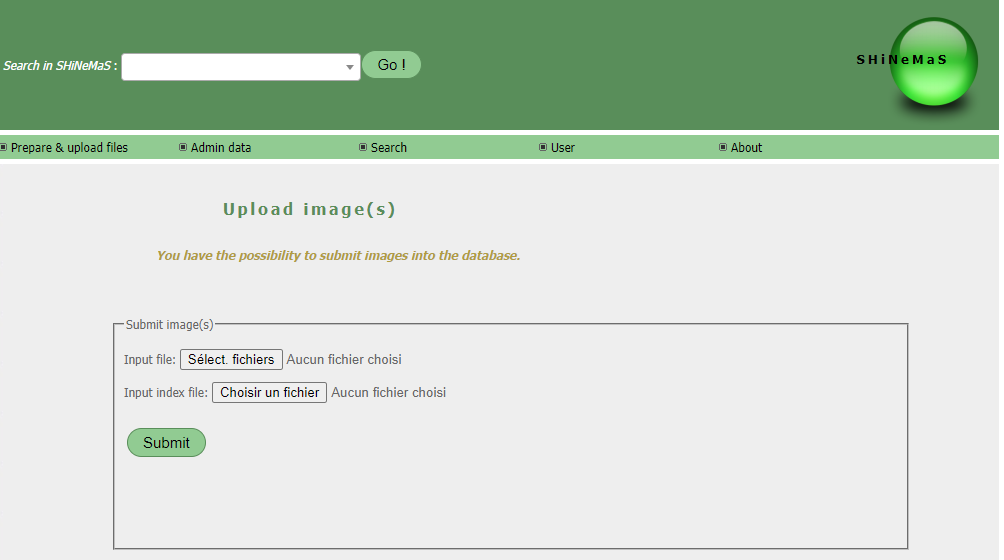
Images upload form
Click on the first field Input file and select the images to upload. It is also possible (but not mandatory) to submit a file with entities information (relation <Network events>, seed lot <Seeds lot management>, `gemplasm <Germplasm management>) to link to the images. The file must be a text file with a defined separator ({tab}, ‘,’, ‘;’ etc.). Headers must be structured this way :
'Image_name','Date','Comment','Germplasm','Relation','Seed_lot'
You can fill several germplasm, relation or seed lot in each column. In that case values are separated by a semi-comma (;). At least one of the previous 3 columns must be filled with at least one value. The date and comment columns are optional. Click on the field Input index file to select this file and then submit the form.
Once the files are submitted SHiNeMaS return a validation form. For each image, a thumbnail is displayed and a form makes possible to fill information for this image. Date and comment fields are still optional and an image must be linked to at least one germplasm, seed lot or relation. If an index file have been submitted, the fields will be pre-filled with the file values. Otherwise all information can be filled at this step.
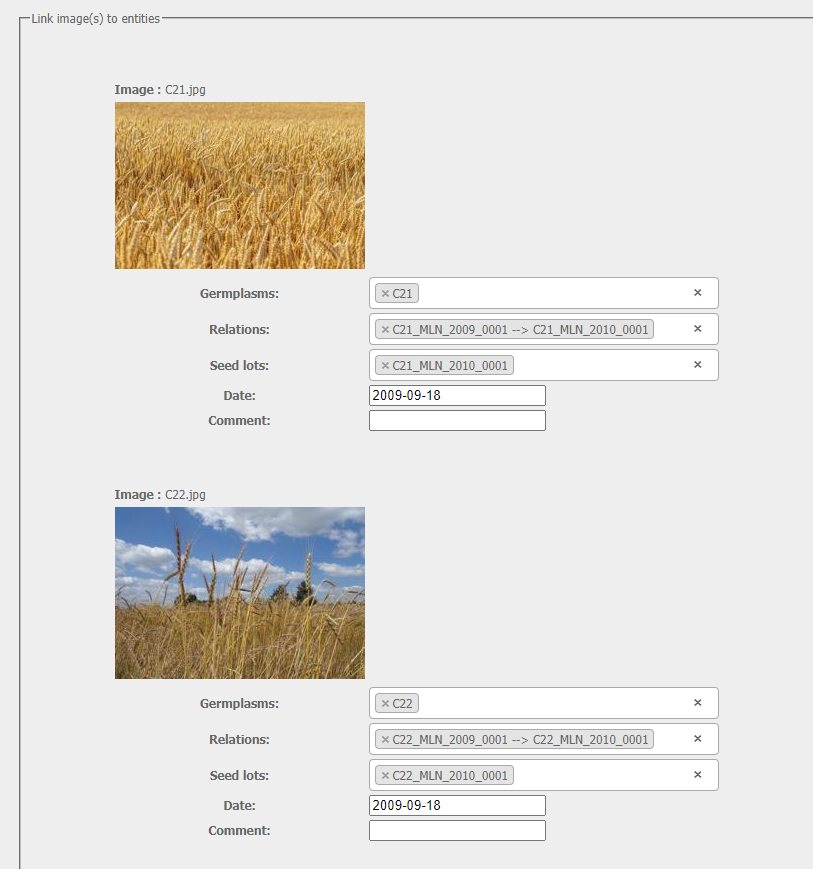
Images validation form
As soon as all images are filled with correct information, click on the “Submit” button. It is possible to cancel images upload by clicking on the “Delete button. The last step display a summary of the images and information submited. Images can be displayed in the profile cards of the related relation, seed lot or germplasm